There are so many reasons you might want to know the geolocation of your users as a startup or solo developer; might be for analytics, security, or content personalization.
But it’s humbling when you paste IPs to your harnesses, such as Claude, and they either cannot confidently output locations at all, or they are outrightly wrong when they do.
Why? Harnesses and search engines are simply not sophisticated enough to narrow down IPs for you. This is why you have to supercharge them with an MCP for proper context and underlying infrastructure.
In this technical guide, you will learn how to request IP geolocation with either API and how to fast-track the whole process as a modern developer with an MCP.
Here is a runthrough of everything to be discussed in this blog:
- IP geolocation is all about knowing the physical location, such as country and city, that a particular IP address is tied to.
- Enterprise and retail need IP geolocation for compliance, security, analytics, and content localization.
- You can use the IPStack API to geolocate IP in Python by writing simple requests parsing scripts.
- The best, and perhaps easiest way, is integrating IPStack MCP to your harness or coding IDE, and requesting to know the physical location of any IP.
What is IP Geolocation?
IP geolocation is the process of detecting where a device, be it mobile or computer, is browsing the internet from through its unique address. For example, if you see this IP address 102.90.81.67 , you can trace it to Amsterdam in the Netherlands.
To refresh your memory, the core of IP address distribution is from various Regional Internet Registries, such as American Registry for Internet Numbers (ARIN) and Asia-Pacific Network Information Centre (APNIC). These registries further assign addresses under their various jurisdictions.
Here is an example of how a geolocation response can look:
For 103.111.0.0, IPStack reports: |
On this note, it is important we clarify early that IP addresses are mostly country-level and city-level accurate at best. In contrast, street-level accuracy is often not even promised, and is inaccurate a good number of times; the main reason for this is majorly compliance.
Why You Should be Interested in Geolocation
Geographical issues are not only for junior engineers, they concern everyone as they pertain to various design decisions in an application. Here are a couple of reasons:
Analytics
One of the ways to grow your startup is to often review your analytics, which will inform you about better ways to serve your users.
IP addresses furnish you with information on the location of your users. Even though you won’t have street-level insights, you will know which countries your users are from.
With this, you can better target this region and gain higher ROI.
Content Personalization
For frontend developers, your website has to render geo-specifically if you want to ensure a smooth UX.
Here is an example, a user browsing your website from the Netherlands should have their prices in €, while the UK users should see £.
By extension, this is also how your website copy will switch rendering languages based on where the user accesses it from.
Security
You’d be security-conscious if your server has ever been crashed by bad actors, or your organization has been a victim of any exploit.
IP geolocation is important to spot where foul-plays are coming from, and save the entire application by rather soft-blocking such locations.
Compliance
Regulation is at the heart of any global product. Different jurisdictions have distinctive data privacy and internet laws. The way to play safe is to adhere to the laws of each country in your applications.
In this instant, geolocation can help you categorize your audience, and filter the kind of content that they get to see on your application.
How to Geolocate IPs with APIs
As much as Python libraries are good for decoding IP addresses, they are not fail-proof. Whenever you are more concerned about the accuracy of your operations, it is often better to look into APIs rather than generally libraries.
Or at best, use both of them in your script. In this case, we will be working with the IPStack API to enhance our IP decoding.
Prerequisite
You don’t need much to get started with this script, only have these installed in your machine:
- Virtual Studio Code
- Python
- IPStack API key
Now go ahead to create a file named ip.py where we will be carrying out our operation.
Step 1: Installing and Importing Supporting Library
We will need to make HTTP requests with the API, and requests is the Python library that can help us do that efficiently. First of all, you must install it via your terminal thus:
pip install requests |
Once the command has run, and it is finally installed, then you can import it into your script:
import requests |
Step 2: IPStack Secret and Target IP
API_DEFAULT_KEY = “Insert” |
To be clear, the most secure way to manage API secrets now is to use paid password managers or open-source packages such as keyring. Nonetheless, we will hardcode in this tutorial for experimental purposes.
Paste your IPStack API key where there is Insert in the API_DEFAULT_KEY object above, which you will get from your dashboard on the website.
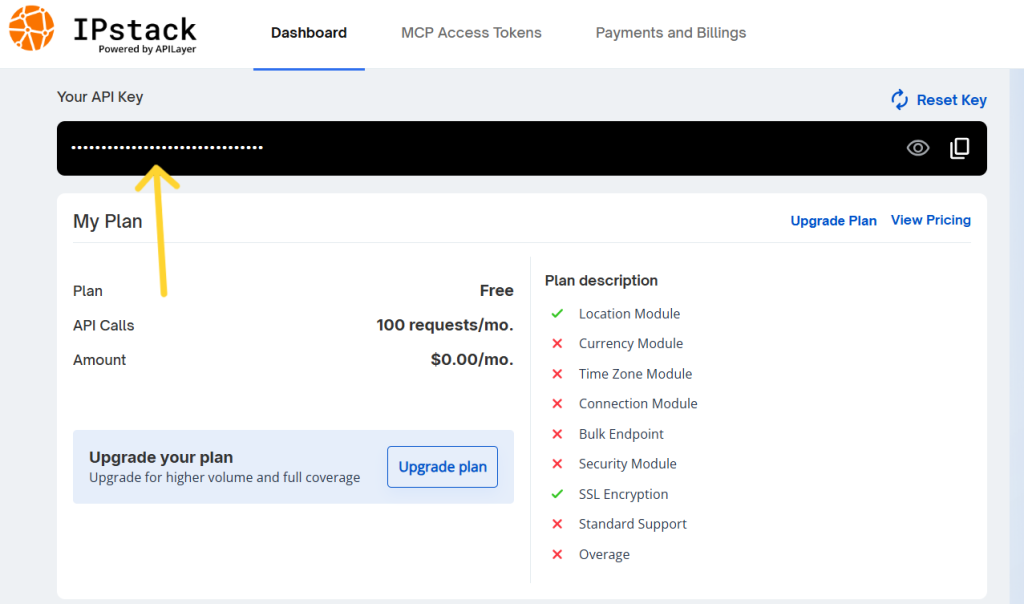
That said, we will go ahead to also include the IP we want to decode; defined as DEFAULT_IP.
Step 3: The Requests
response = requests.get( |
We made a GET request here, and within it, we had to point out api.ipstack.com as our target website, and also formatted it so our default IP can be automatically inserted.
According to the official IPStack technical documentation, one major parameter is required in this case; which is access key. Thus we filled the parameter with API_DEFAULT_KEY which we have already defined.
Step 4: Error Handling
response.raise_for_status() |
If you are familiar with raise_for_status(), you’ll recall it is a method of requests that handles errors gracefully. Then we used RequestException which is more general.
Of course, the actual GET request and the RequestException had to be embedded in a try/catch.
Step 5: Printing in the Terminal
print(response.text) |
This is pretty straightforward as print(response.text)tells the compiler that the response should be in text format. Also, we had to put main so the script can execute directly.
Full Code
Here is the full code:
{import requests

API_DEFAULT_KEY = "INSERT YOUR API KEY"
DEFAULT_IP = "103.111.0.0"


def main():

    try:
        response = requests.get(
            f"http://api.ipstack.com/{DEFAULT_IP}",
            params={"access_key": API_DEFAULT_KEY},
            timeout=10,
        )
        response.raise_for_status()
    except requests.RequestException as e:
        print(f"Request error: {e}")


    print(response.text)


if __name__ == "__main__":
    main()
Results
Here is how the results will look in the CLI:
{"ip": "103.111.0.0", "type": "ipv4", "continent_code": "EU", "continent_name": "Europe", "country_code": "AL", "country_name": "Albania", "region_code": "AL-11", "region_name": "Tirane", "city": "Tirane", "zip": "1700", "latitude": 41.32999038696289, "longitude": 19.82999038696289, "msa": null, "dma": null, "radius": "0", "ip_routing_type": "fixed", "connection_type": "dsl", "location": {"geoname_id": 3183875, "capital": "Tirana", "languages": [{"code": "sq", "name": "Albanian", "native": "Shqip"}], "country_flag": "https://assets.ipstack.com/flags/al.svg", "country_flag_emoji": "\ud83c\udde6\ud83c\uddf1", "country_flag_emoji_unicode": "U+1F1E6 U+1F1F1", "calling_code": "355", "is_eu": false}}As you can see, the script fetched the correct location of the IP, which is Albania, with the city specificity being Tirana; the Capital.
How to Get IP Geolocation with IPStack MCP
IPStack has an MCP server that makes the entire Python-based IP geolocation a faster experience. Interestingly, it is easy to set up; you only have to take a few steps, which we will go over subsequently.
Prerequisite
Download Cursor through the official website here and complete the installation on your machine.
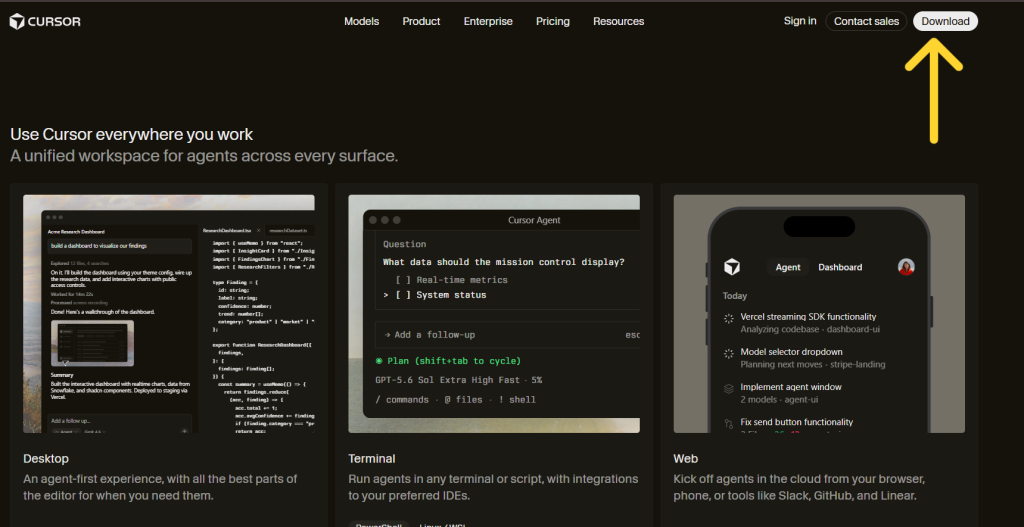
Practically, you can integrate the MCP into Claude, Codex, Cursor, and VS Code. But for the purpose of this tutorial, we will mainly be looking into its integration with Cursor.
Why? The engineers at Cursor were the creators of what we know today at MCP, so integrating MCP is most native to Cursor.
Integrate via JSON or CLI
- Go to your General Settings, and click on “Customize.”
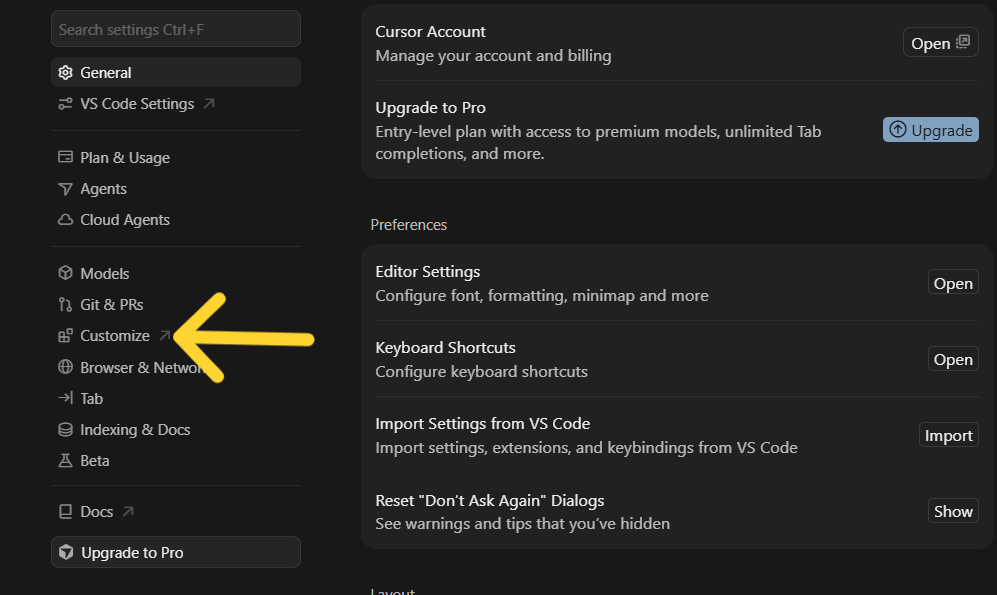
- Click on “New MCP Server
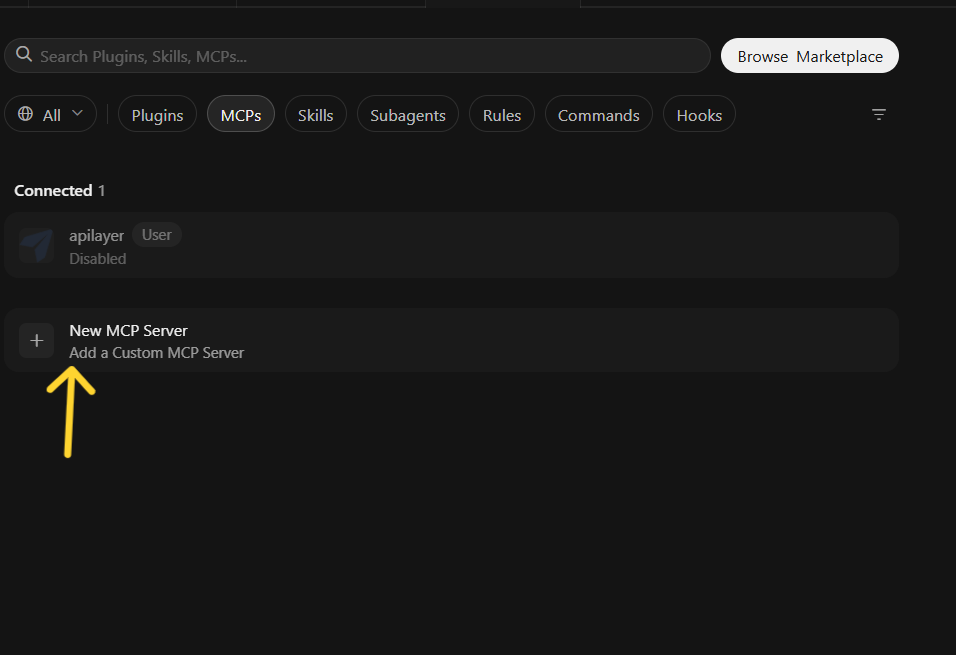
Paste the integration JSON into your Cursor file:
{
  "mcpServers": {
    "apilayer": {
      "url": "https://mcp.apilayer.com/mcp",
      "headers": {
        "Authorization": "INSERT YOUR API KEY"
      }
    }
  }
}
Install as an NPX Package
You can install IPStack MCP as an npx package. Open your terminal and paste this:
| npx @apilayer/mcp–server |
Since you have all the prerequisites, particularly the MCP already integrated, you can go ahead with these steps:
Step 1: Write a Prompt Including the IP You Want to Geolocate
This is very straightforward, you have to input. You have to query your agent with what you want. In this context, here are a couple of things your query should have:
- Target IP
- The fact that you want to know its physical location
- Supporting Python code on how it got the answer (this is optional and after-the-fact since you’ll have the answer anyway)
Here is the prompt I used:
| here is my IPStack API: INSERT_YOUR_API use it to get the geolocation of this IP: 103.111.0.0 write a python script to get the IP |
Step 2: Results
Based on my prompt, it gave me 2 responses:
1. The straight answer on the location of the address
- Python script to get it myself
Here are the results:
For 103.111.0.0, IPStack reports: |
It is as simple as that! With IPStack MCP, all you have to geolocate any IP is one single prompt.
And this is the supporting script:
import requests

KEY = "INSERT YOUR OWN API KEY"
IP = "103.111.0.0"

r = requests.get(f"http://api.ipstack.com/{IP}", params={"access_key": KEY}, timeout=10)
r.raise_for_status()
print(r.json()
Conclusion
There are 2 major problems you must have encountered when you want to decode any IP.
First one, if you want to write a bare metal Python script with only libraries for the retrieval, you will get disappointed. Same thing with when you paste an IP address into harnesses.
For more reliable outcomes, it is better to use APIs as they already have the infrastructure to pull geolocation through. Better still, you can simply leverage the MCP to get accurate responses in your chat box.
For enterprise organizations, you can sign up for the IPStack API subscription as the IP infrastructure for your teams and agents to be more efficient at scale.
Frequently asked questions
Is it a good idea to build my IP geolocation in python with only libraries?
Not at all, and this is because there are so many infrastructural weaknesses libraries like geoip2 have that will make them either not work or give you extremely false results.
Which IP geolocation MCP server is the best?
Currently, the IPStack MCP is the most popular choice among Python developers. Thus, it is the best in the industry.
Do I still need to supply my IPStack API to connect the MCP?
Yes, you’ll have to supply your API key under authorization in your MCP JSON connection file.
How can I make my agent get more accurate for IP geolocation?
You can empower your agent by adding IPStack MCP as a connector to your harnesses.
Can I use IPStack MCP in VS Code?
Absolutely, you can. You can install it via your terminal or add the server configuration through your MCP extension.
Try ipstack free
IP-to-location, ASN, ISP, time zone and threat data from one endpoint. Get a key and make your first call in under a minute.

Karam Alsalhani
All articles by Karam →